- arrow_back Home
- keyboard_arrow_right Gaming Guides
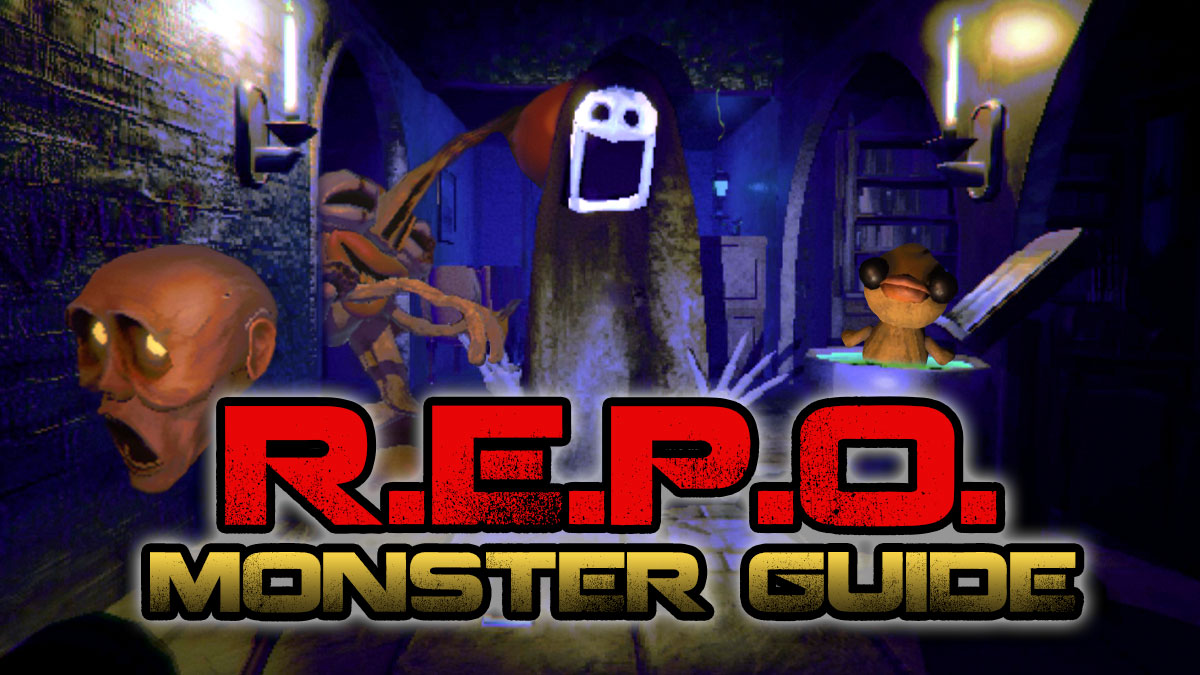
R.E.P.O. Monster Guide: How to Survive the Horrors
Gaming GuidesHorror GamesNew Releases 24 108 4 Ayefkay March 26, 2025

Meet the Monsters in R.E.P.O.
The survival horror scene just got its newest addiction, and R.E.P.O. is clawing its way up the Steam charts faster than The Huntsman shooting a sneeze.
If you’re diving headfirst into this terrifying world, you’ll need more than just guts—you’ll need a plan. This guide is your ultimate cheat sheet for dealing with every nasty thing lurking in the dark.
We’re breaking this down into two main categories: small monsters (a.k.a. the annoying little creeps that will ruin your day) and large monsters (the real threats that, thankfully, cough up some good loot when they go down).
You can scroll down the guide or just click on the monsters’ names below.
R.E.P.O.'s Small Monsters
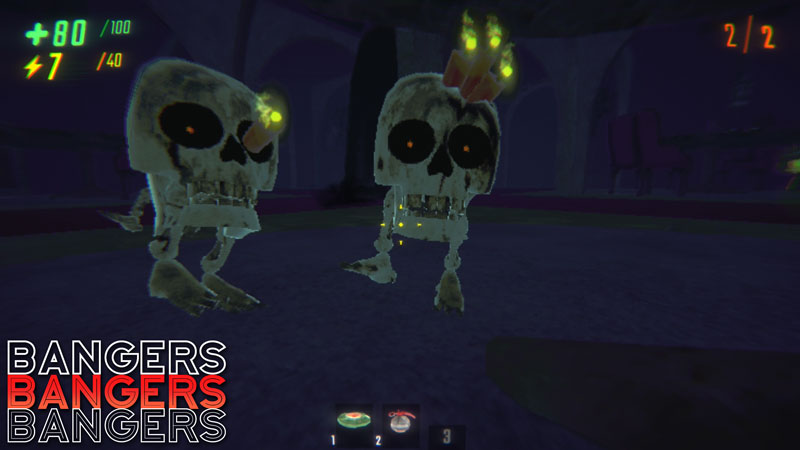
Banger (Skull Grenades)
Health: 50
Damage: 30 per explosion (plus environmental damage if sent flying)
Strength to Lift: 0
Orb Value: N/A
Imagine if a lit firecracker had legs, an attitude problem, and an unrelenting thirst to take you with it. That’s Banger. It’s a living bomb that has one goal in life: run at you and explode.
Simple, effective, and absolutely rage-inducing in the wrong situations.
Banger Strategy
Social Distancing Works Here Too. Stay the hell away. If you hear that tick-tick- BOOM sound, you’re already too close. They typically spawn in packs of 3, so the biggest threat of Bangers is a team wipe – make sure you’re not grouped up.
Let Nature Handle It. Bangers don’t have brains, so if you can lure them into water, pits, or any other environmental hazard, they’ll happily off themselves.
The YOLO Grab. You can pick them up and throw them down the hall or at other enemies, but if you fumble it… well, hope you’ve said your goodbyes.
Give Them a Quick Death. Bangers only have 3 health so you can easily dispatch them, even if you don’t have a weapon. Just pick them up and give them the Gnome treatment.
Pro Tips & Extra Screaming
Chain reactions are a thing. If one Banger pops near another, it’s fireworks time. If you’re caught in the blast zone, might as well start writing your will.
They can chase you pretty persistently, so it’s better to take care of them quickly if they see you, before running into something else. So yeah, good luck navigating tight hallways.
Gnome
Health: 20
Damage: 10
Strength to Lift: 0
Orb Value: N/A
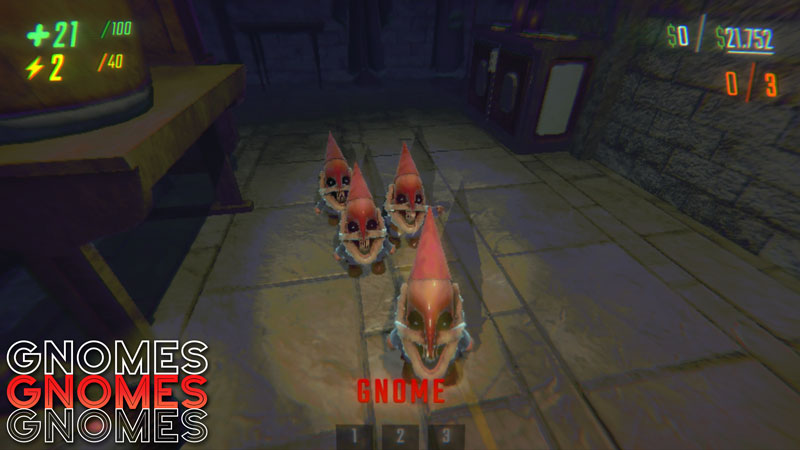
You ever had an older sibling break your stuff just to make you suffer? That’s Gnome. Except instead of a jerk brother, it’s a group of tiny nightmares that scurry around, breaking anything that actually matters to your survival. They’re like if kleptomaniacs were bite-sized and way too fast for comfort.
Gnome Strategy
Lock Up Your Valuables. If it’s on the ground and they’ve seen you, it’s basically a free snack for a Gnome. Keep your loot away from them.
Move Fast. If they target you or your loot, you better start picking them up and breaking them like your life depends on it. Because it might.
Squad Goals. Let your team know when a group is lurking nearby so you can shut down the chaos before it starts.
Pro Tips & Extra Screaming
They will target and damage you if your loot isn’t around, but Gnome damage is pretty negligible to player health. I prefer it over loot damage at least.
They’re tiny, fast, and evil. If you hear chittering noises, start guarding your inventory like a dragon hoarding gold. They won’t start attacking loot unless they see you first, so it’s typically ok to leave your loot and hide.
That being said, don’t hide too close to walkways. If you’re right next to them, they’ll see you under chairs, tables, etc. and usually walk back to where they died so move your loot and you to a new spot after smashing them up.
Hidden
Health: 100
Damage: 0 (can still hurt from environmental damage)
Strength to Lift: 4
Orb Value: $3.5k – $7k
Hidden is basically a yeet-filled game of Where’s Waldo, except instead of a friendly guy in a striped shirt, it’s a mostly-invisible smoky predator waiting to kidnap you from your miserable little adventure. It’s very stealthy – and when you notice it, it’s probably too late.
Hidden Strategy
Be Quick on the Saves. It is possible to grab your friend if Hidden grabs them, however, you have to be really fast, because more than likely they’ll be gone before you know it.
Watch for Footsteps. While invisible, Hidden is not-so-hidden when you can see his shadowy footsteps on the ground. If you happen to notice these and have a melee weapon available, I suggest swinging wildly in the general direction.
Stay in a Group. Hidden loves picking off the lonely. Don’t be the one guy who strays from the team just to be carried far far away five seconds later.
Pro Tips & Extra Screaming
If you can’t fight it, you run. If you see it, get the hell out before it carries you to the shadow realm…which is just far away apparently.
If you think it’s there but you’re not sure—assume it is. Paranoia is your best friend in R.E.P.O.
Peeper (The Eye Monster)
Health: 30
Damage: 2 per second
Strength to Lift: N/A
Orb Value: $2k – $3k
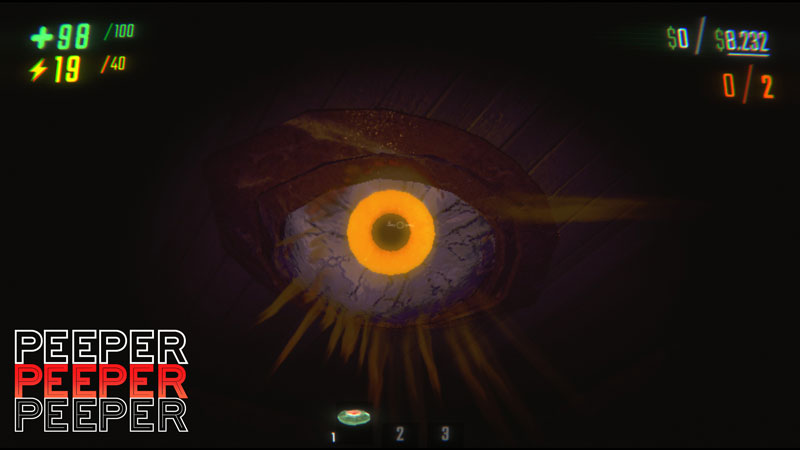
Ever get that feeling you’re being watched? Meet Peeper, the literal embodiment of your paranoia.
This floating eyeball teleports and attaches itself to ceilings before forcing a closer perspective and damaging you while you stay in its line of sight, making you question all your life choices that led to this moment.
Peeper Strategy
Avoid Direct Eye Contact: Treat it like that awkward ex at a party—just don’t engage. Peeper thrives on attention; ignoring it is your best bet and will typically despawn seconds after freeing a victim.
Stay Out of Sight: Use the environment to break its line of sight. Walls are your friends; open spaces are not.
Move From Where You Came From: Standing still makes you an easy target. Try to move backwards from where you came from since you know there is nothing (likely) waiting there.
Pro Tips & Extra Screaming
Paranoia Inducer: Peeper attacks you directly after staring at it for 3+ seconds, with a constant 10 damage per second, but can be difficult to avoid because of the forced perspective.
Open Your Map: If you’re grabbed by the Peeper, you can still open your map with Tab and use that to help better navigate the area.
Use Items to Block Line of Sight: You can use medium to large items to block the Peeper’s line of sight.
Rugrat (The Baby Monster)
Health: 150
Damage: Depends on Size of Item Launched
Strength to Lift: 4
Orb Value: $2k – $4k
Remember when you thought babies were cute? Rugrat is here to shatter that illusion. This pint-sized terror crawls around with unsettling speed, emitting creepy giggles that make you question every horror movie you’ve ever seen.
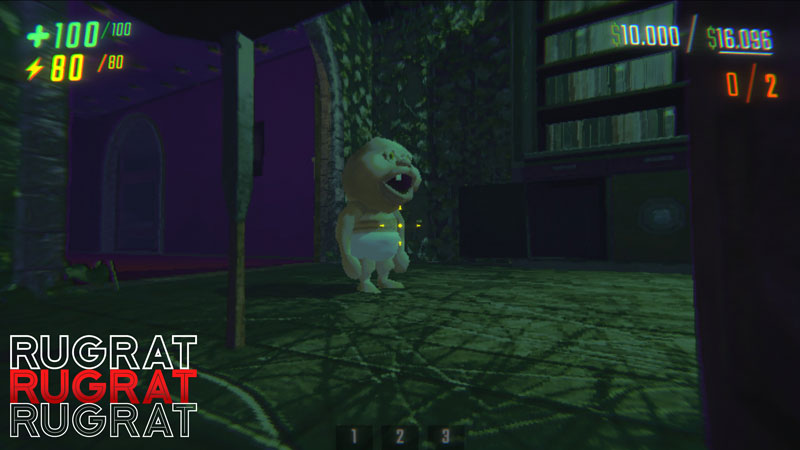
Rugrat Strategy
Don’t Engage Around Items. The Rugrat will grab any items near him and will toss them at you with the swiftness. The larger the item available, the more the damage (not to mention the lost loot from throwing it).
Keep Your Distance: Rugrats may be small, but they’re fast. Maintain a safe distance to avoid their sudden lunges.
Aim Low: If you have to engage, remember they’re close to the ground. Adjust your attacks accordingly.
Pro Tips & Extra Screaming
No Items Around and It Flees: If the Rugrat has nothing to throw at you when it sees you, it will make a hasty retreat so engage with the Rugrat on your terms.
No Strength, Get Help: The Rugrat is still a baby, so pick it up with 2-3 people and show him he’s not the only person that can throw things. If you have Strength upgrades, this makes tossing the baby much easier.
Use Items to Your Advantage: If you don’t have any weapons, you can use smaller items with your scroll wheel to continuously bash the Rugrat. Keep repeating to gain it’s core.
Spewer (Vomit Fish)
Health: 65
Damage: 10
Strength to Lift: 3
Orb Value: $1k – $4k
If you thought your college roommate’s hangover was bad, meet Spewer. This grotesque creature lumbers around, projectile vomiting toxic sludge that you’d rather not think about but will damage anything that it comes in contact with.
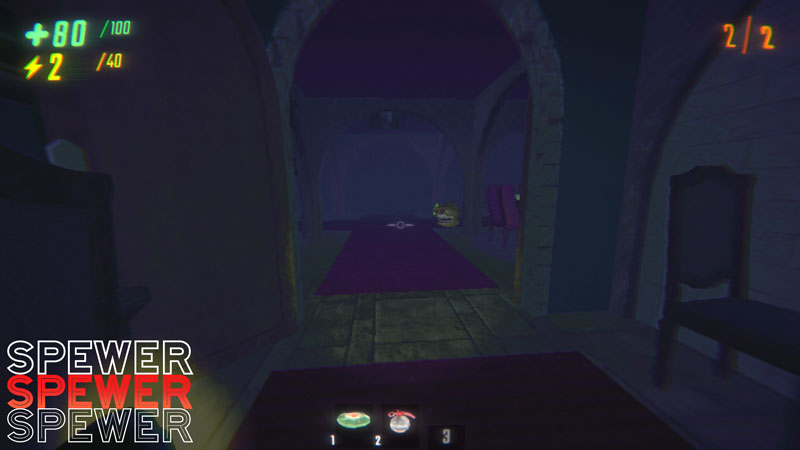
Spewer Strategy
Keep Your Distance: Spewer’s vomit has range. Stay back to avoid getting hit.
Watch for Wind-Up: There’s a brief moment before it spews where it hunches over. Use this cue to dodge.
Flank and Spank: Spewer has a limited turning radius. Circle around to its back for safer attacks.
Pro Tips & Extra Screaming
Environmental Hazards: The vomit’s danger isn’t in the damage it can deal to you, it’s in the corrosive damage it can do to items and enemies – including Apex Predator!
Slow and Steady: Spewer is slow-moving. Use this to your advantage to keep your distance or set up attacks.
Upscream
Health: 50
Damage: 10
Strength to Lift: 3
Orb Value: $2k – $4k
Imagine a creature that’s basically a walking siren with a vendetta. Upscream is a grotesque little being that, when sees you, grabs you, emits ear-piercing screams, and tosses you away.
This deals damage while effectively alerting every other monstrosity in the vicinity to your presence. It’s like that one friend who can’t keep a secret, but instead of spilling gossip, they’re summoning your doom.
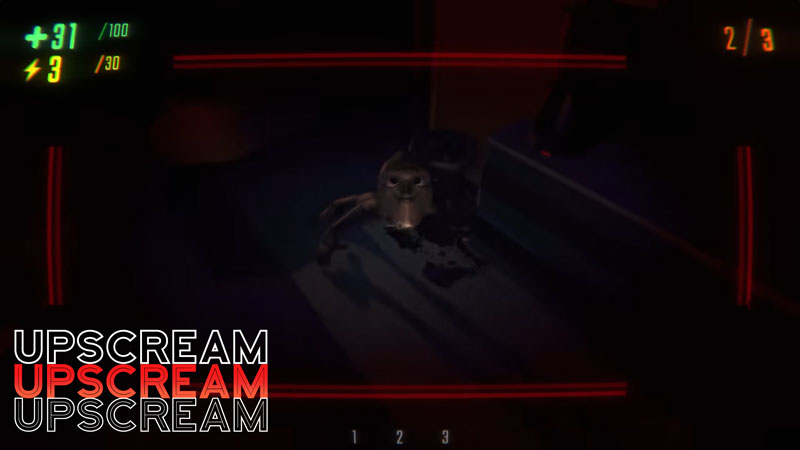
Upscream Strategy
Silence is Golden: The moment you spot Upscream, take it down quietly. Suppressors, melee weapons, or any method that doesn’t involve loud noises will be your best friends here.
Stay Out of Sight: Upscream’s vision isn’t the best. Use shadows, cover, and good old-fashioned sneaking to avoid its line of sight.
Divide and Conquer: If you’re in a group, coordinate to distract Upscream while others move past. Just make sure the distraction doesn’t end with someone becoming monster bait.
Pro Tips & Extra Screaming
Chain Reaction Warning: If Upscream alerts other creatures, be prepared for a swarm. Always have an escape route planned. While one Upscream isn’t a huge threat, multiple Upscreams can stunlock a character to death, wishing they brought their earbuds.
Ear Protection Not Included: Its screams can disorient you for 2 seconds after the throw, so keep your wits about you and don’t let panic set in.
Avoid Pits and Environmental Damage: The real issues with Upscream lies in the throw, which can land you in some deadly places if you’re not careful. If you engage, make sure to do so where there are no pits behind you.
R.E.P.O.'s Large Monsters
Animal
Health: 150
Damage: 2
Strength to Lift: 4
Orb Value: $2k – $4k
Don’t let the generic name fool you; Animal is a not-so-threatening beast that focuses more on running away than fighting. Resembling a grotesque fusion of various predatory creatures, it’s fast, goofy, and typically worth killing for its core value.
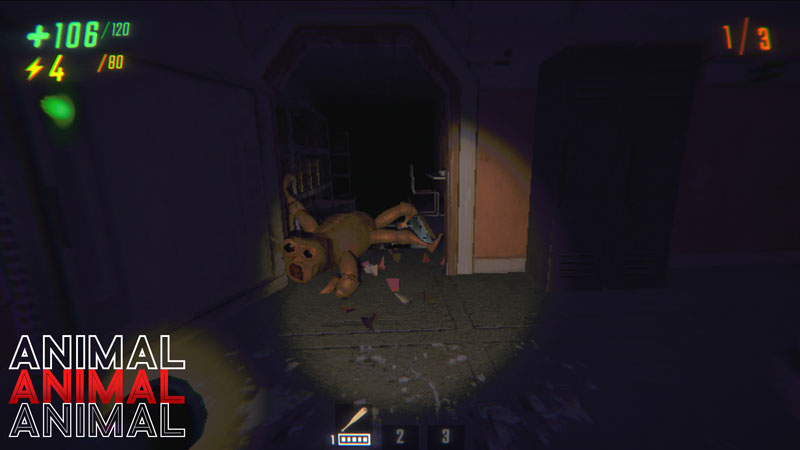
Animal Strategy
Low Threat Monster: While Animal may seem threatening with all those appendages, he’s really not a fighter – dealing only 2 damage per attack.
Lover Not a Fighter: If you try to pick Animal up, most of the time he will turn into Sonic the Hedgehog and try to book it out of there with a light speed dash.
Heavier Than it Looks: Animal can be picked up with 4 players working together or a single player with 4 strength upgrades.
Pro Tips & Extra Screaming
Keeping it Alive: While it goes through the level like a ball through a pinball machine, it’s going to be damaging itself and the environment. You can actually keep him alive to act as your personal Gnome-dispatching Roomba.
Apex Predator (Duck of Doom)
Health: 150
Damage: 10 (can attack up to 3x per second)
Strength to Lift: N/A
Orb Value: $2k – $3k
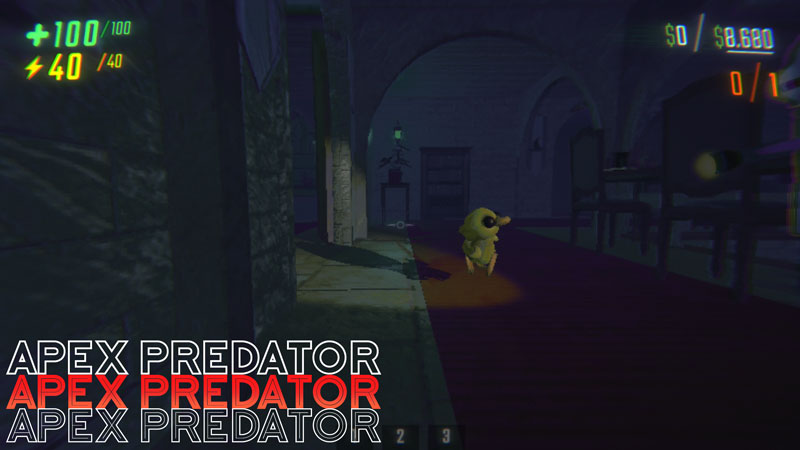
Yes, you read that right. Apex Predator is REALLY a monstrous, mutated duck that’s anything but the cute, bread-munching bird you’re used to.
This quacktastic nightmare appears as a kawaii-inducing duck that will relentlessly follow you around and ask for hugs, even willing to jump in front of your cursor to get them – but once interacted with by the player or damage, turns massive, aggressive, and has a bone to pick with anything that moves. It’s like Mother Nature’s twisted joke, and you’re the punchline.
Apex Predator Strategy
Respect the Duck: Apex Predator’s danger is with engaging. Once you touch him or he takes environmental damage, he will come at the player who engaged with or the closest player in the case of environmental damage.
His Enraged Attacks are Devastating: He will enrage for 10 seconds, during which he can attack for 10 damage, up to 3 attacks per second.
Run if Enraged: Stuff happens and you’re bound to make him mad at some point. When this happens, run as quickly as you can, but don’t depend on a hiding spot because it will find you. Last the 10 seconds and it will revert to it’s adorable form again.
Pro Tips & Extra Screaming
Avoid the Enrage: Apex Predator is highly lovable. If you interact with it in any way it will try to get in front of your clicker so I typically try to bait upwards to one side to make it jump up before I turn around and grab whatever I was intending to.
Audio Cues: Listen for deep quacking sounds or cute little footsteps as indicators of its presence. When you hear them, it’s time to either hide or prepare for a friend.
Send it to the Shadow Realm: There’s a glitch where if you get the Apex Predator stuck under some chairs in it’s cutesy form, it will continue to quack rapidly and jump. Let it keep doing this for a while and it will shrink itself and despawn into oblivion. No loot, but no chance of enraging either.
Extract It’s Cuteness: If you can’t despawn him with a chair, your best bet is to use an Extractor. By carefully positioning yourself in front of the Extractor, you can bring down the justice and destroy the Apex Predator. Just don’t get yourself squished while trying this.
Flush the Duck or Use Cauldrons: If the map allows, you can also easily dispatch the Apex Predator by making it follow you into a toilet and flushing it to victory. The same strategy can be used with a cauldron in the Magic School.
Bowtie
Health: 100
Damage: 4 per tick (environmental damage is much more)
Strength to Lift: 7
Orb Value: $3k – $7k
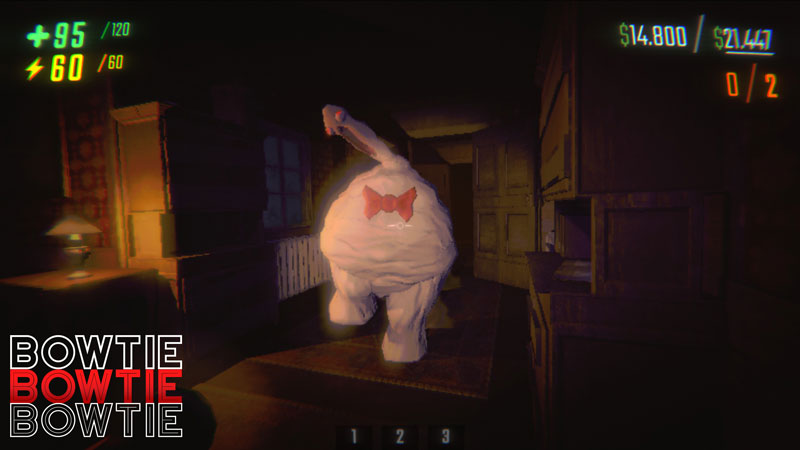
Meet Bowtie, a large, puffy monstrosity that roams the corridors with a medium-paced gait, looking like it raided a 1920s formalwear shop. But don’t be fooled by its dapper accessory; this thing is all about ruining your day by blowing you into the environment.
Bowtie Strategy
Keep Your Distance: The moment Bowtie spots you, it morphs into a fan and unleashes a continuous stream of air that pushes you back, disabling your sprinting and jumping abilities. Maintain a safe distance to avoid getting caught in its vortex.
Use Cover: Duck behind walls or large objects to break line of sight and listen for his loud, fast stomps while he’s pathing around the map.
Sidestep Strategically: If caught in the open, move laterally to escape the pushback zone as quickly as possible.
Pro Tips & Extra Screaming
Environmental Hazards: While the scream itself doesn’t deal damage, being pushed into walls or obstacles can hurt—a lot. Pitfalls can obviously be your doom, so watch your surroundings.
Monster Bowling: Bowtie can inadvertently push smaller monsters like Rugrats, Bangers, and Gnomes, causing unexpected chaos. Use this to your advantage or prepare for mayhem.
Attack While He’s Busy: Bowtie will be locked in his blowing animation for a while so if you’re able to get behind or to the side of him during it – unleash your fury. Both melee and ranged weapons are effective and killing will net you some good cash.
Chef (Frog)
Health: 150
Damage: 10 per tick (can take multiple ticks per attack)
Strength to Lift: 9
Orb Value: $2k – $5k
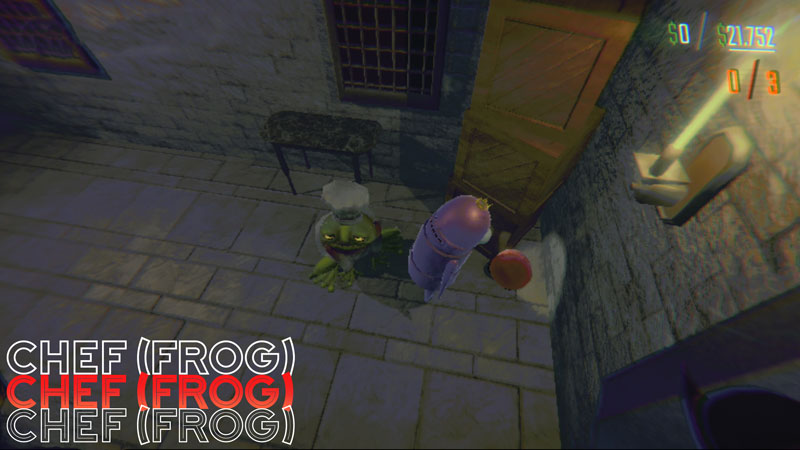
Straight out of a culinary nightmare, Chef is a slow-moving, frog-like creature donned in a chef’s uniform, complete with oversized cleavers that it wields with unsettling enthusiasm.
Chef Frog Strategy
Anticipate the Leap: Upon spotting you, Chef pauses, grins (because why not?), and then lunges while swinging its cleavers. This leap locks its direction, giving you a brief window to sidestep.
Use Obstacles: Position yourself behind doors or walls to block its lunge and force it into a reset.
Keep Moving: Chef’s slow movement means you can outmaneuver it in open spaces—just don’t get cornered.
Pro Tips & Extra Screaming
Damage Control: While Chef’s attacks are painful, they won’t one-shot you if you’re at full health. Still, best not to test your luck.
Predictable Patterns: Chef’s attack pattern is consistent; learn it to exploit openings and counterattack after it misses a lunge and is stunned on the ground.
Use Items and Scroll Wheel: If you don’t have the strength or numbers to pick it up, you can use smaller items along with your scroll wheel to beat it into submission.
Clown
Health: 250
Damage: Laser 100; Kick 60
Strength to Lift: 13
Orb Value: $5k – $8k
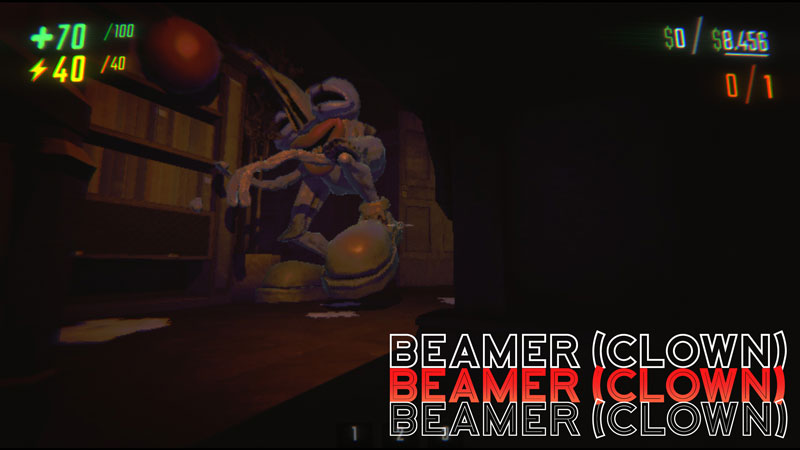
As if clowns weren’t terrifying enough, enter the Clown (Beamer)—a fast, loud monstrosity that combines unsettling laughter with deadly precision. Its heavy footsteps are the harbinger of doom, and its laser beam is the punchline you don’t want to experience.
Clown Strategy
Stay Alert: The Clown’s loud stomping gives away its position. Use this audio cue to avoid crossing paths.
Break Line of Sight: If spotted, immediately seek cover to block its laser beam attack.
Keep Your Distance: The further you are, the better your chances of dodging its sweeping beam.
Pro Tips & Extra Screaming
Beam Sweep: Upon spotting you, the Clown laughs and then sweeps its laser horizontally, covering a wide angle and potentially destroying loot.
Follow-Up Attack: After the laser, it quickly approaches to deliver a kick. Don’t get caught off guard; keep moving and stay out of its reach.
Bob and Weave the Laser: The Clown’s beam will target you based on when it starts it’s charge animation. So if you were ducking, it will target down and allow you to jump over it. If you were standing, it will target up allowing you to duck under it.
Jump Over Kicks: After the beam attack, the Clown will generally rush in for a kick attack. Time this correctly and you can jump over the kick without taking damage.
Headman (Floating Head)
Health: 250
Damage: 50
Strength to Lift: 13
Orb Value: $4k – $8k
Imagine a giant, disembodied head floating through the corridors, exuding an aura of pure menace. That’s the Headman for you—a grotesque, oversized cranium that seems to have misplaced its body but not its appetite for destruction and disdain for light.
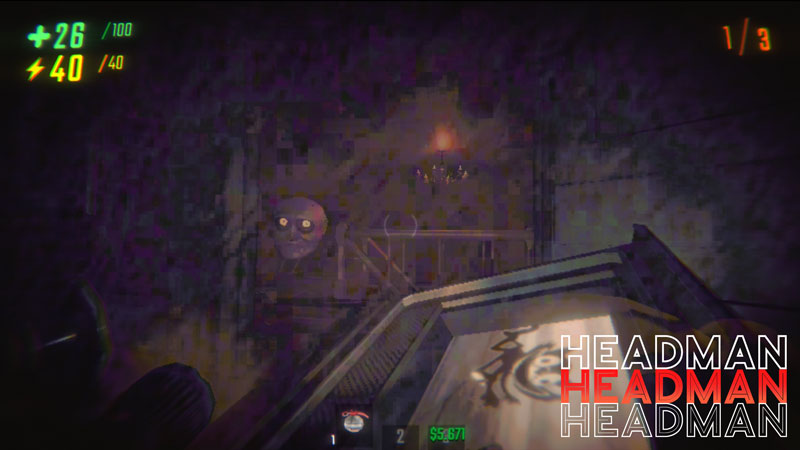
Headman Strategy
Stay Out of Sight: Headman patrols areas methodically. Use the environment to break line of sight and avoid drawing its attention.
Don’t Go Towards the Light: This floating fiend is attracted to light. Keep your flashlight out of its face and you’ll have a much better chance of living.
Know When to Run: If Headman spots you, it will pursue relentlessly and can attack underneath hiding spaces. Sprinting away and breaking line of sight is crucial to survival.
Pro Tips & Extra Screaming
Environmental Awareness: Use doors and obstacles to your advantage. Closing doors behind you can slow down Headman’s pursuit.
Team Coordination: If playing with others, communicate Headman’s location to avoid accidental run-ins since he’s basically silent roaming the halls.
Attacks Under Environments: Make sure to break line of sight before hiding, as the Headman can float down and still bite for pretty big damage.
The Huntsman
Health: 250
Damage: 100
Strength to Lift: 9
Orb Value: $3k – $7k
The Huntsman is a blind, slender figure with elongated limbs carrying a shotgun and a bandaged face, exuding an eerie silence as it moves. Its unsettling presence is enough to send shivers down the spine of even the most seasoned operatives.
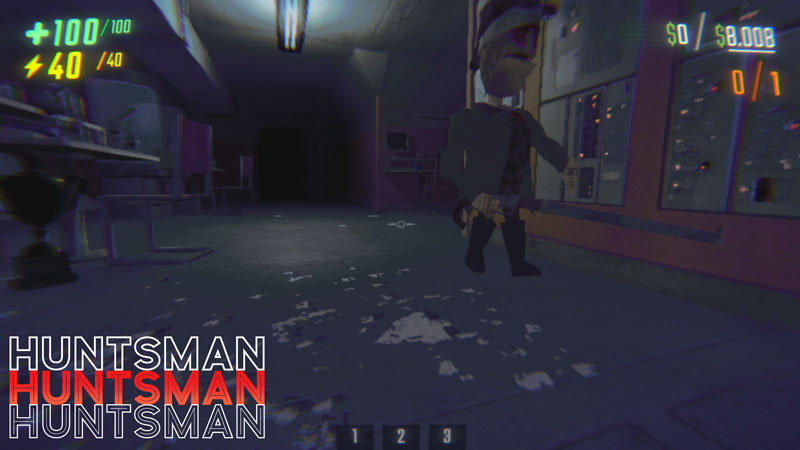
Huntsman Strategy
Don’t Make a Sound: The Huntsman targets noise. Regular movement, Text to Speech, talking over chat, and running are all quick ways to find a bullet in your robot head.
Avoid Narrow Spaces: Engaging the Huntsman in tight corridors is a death sentence. Stick to open areas where maneuverability is possible.
Use Distractions: Throwing objects or creating noise away from your position can divert the Huntsman’s attention temporarily.
Pro Tips & Extra Screaming
Listen Carefully: The Huntsman’s approach is nearly silent, but subtle audio cues like faint footsteps can give away its position.
Gravity Challenged: Since the Huntsman is blind, use any staircases to your advantage by baiting him up and watching him fall down. You can do this over and over for a slow kill and some cash if you don’t have anything better.
Mentalist (Alien)
Health: 150
Damage: 50 (plus environmental damage)
Strength to Lift: 4
Orb Value: $3k – $6k
The Mentalist is an extraterrestrial entity with an oversized, pulsating brain and glowing eyes that seem to peer into your very soul. Its psychic abilities make it a formidable foe, capable of telekinetically floating you and your surroundings up before giving you the Charizard Seismic Toss.
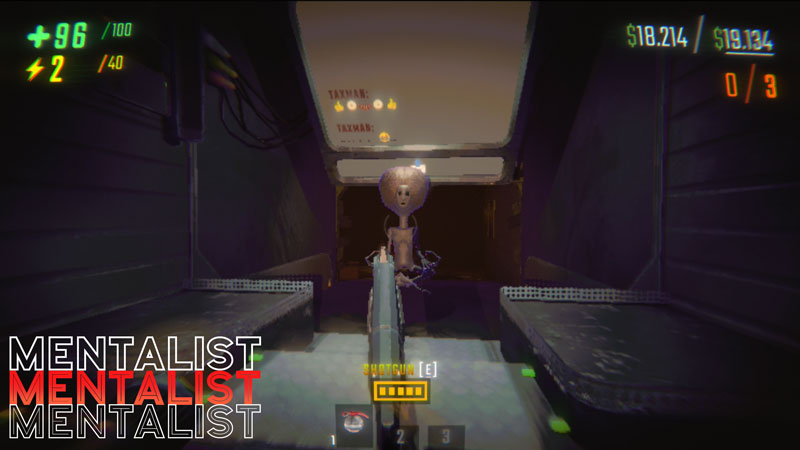
Mentalist Strategy
Stay on Your Toes: The Mentalist can teleport around the map randomly, so there’s really no point when you’re truly safe. Keep your eyes open and be ready to run.
Protective Gear: Melee weapons are pretty effective since he only has 150 HP and is stuck in his levitating animation for 10 seconds before he brings the pain.
Maintain Distance: The Mentalist’s abilities have a limited range. Keeping a safe distance can mitigate its effects.
Pro Tips & Extra Screaming
Team Support: Having a teammate nearby can help snap you out of the anti-gravity effect induced by the Mentalist.
Environmental Hazards: Be cautious of your surroundings when under the Mentalist’s influence, as your levitating can quickly lead to death.
Use Ranged Weapons: Tranquilizer Gun and Shotgun work well.
Reaper
Health: 250
Damage: 10 (swift attacks add up quickly)
Strength to Lift: 9
Orb Value: $6k – $8k
The Reaper is the embodiment of your worst nightmares—a skeletal figure draped in tattered robes, wielding giant swords for arms that scream “game over.” This ghastly entity doesn’t just look the part; it plays for keeps, relentlessly pursuing those who dare to enter its domain.
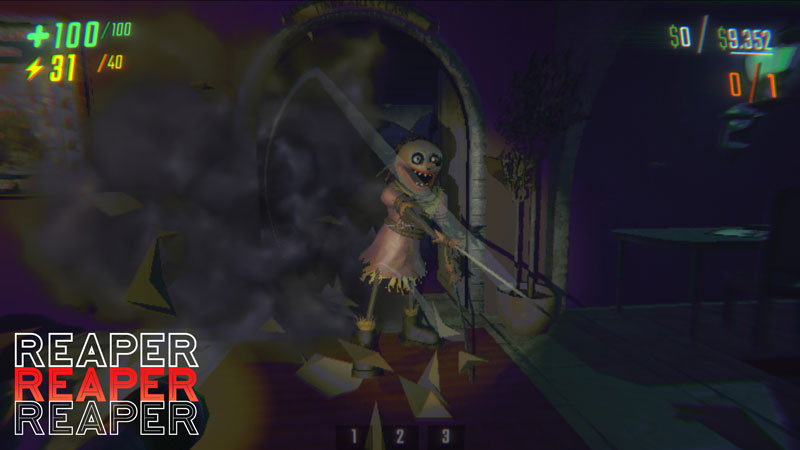
Reaper Strategy
Stay on the Move: The Reaper has a one-track mind and it’s set on you. Keep moving to make yourself a harder target.
Use the Environment: Doors, obstacles, and tight corners can slow down the Reaper’s pursuit. Use them to your advantage to break line of sight and catch your breath.
Coordinate with Your Team: If you’re not flying solo, communicate with your squad to distract and divert the Reaper’s attention when necessary. She is deaf with pretty bad eyesight so try to break line of sight while warning your team.
Pro Tips & Extra Screaming
Audio Cues: Listen for the telltale sound of the Reaper’s footsteps to gauge its proximity.
Just Try Hiding: If it spots you, focus on evasion and strategic movement before breaking line of sight. Reaper’s movements and attacks are simple to read, so take advantage. Just make sure to break line of sight first, because they can attack while you’re hidden.
Robe
Health: 250
Damage: 100 to standing; 50 to crouching
Strength to Lift: 13
Orb Value: $5k – $8k
Robe is an enigmatic figure shrouded in a flowing cloak, its Shinigami-esqe features obscured and intentions unclear except for the fact that it REALLY doesn’t like you looking at its mask.
Unlike most other entities, Robe doesn’t make a sound while roaming the map, so if you’re not sure what monsters you are dealing with – stay on your guard.
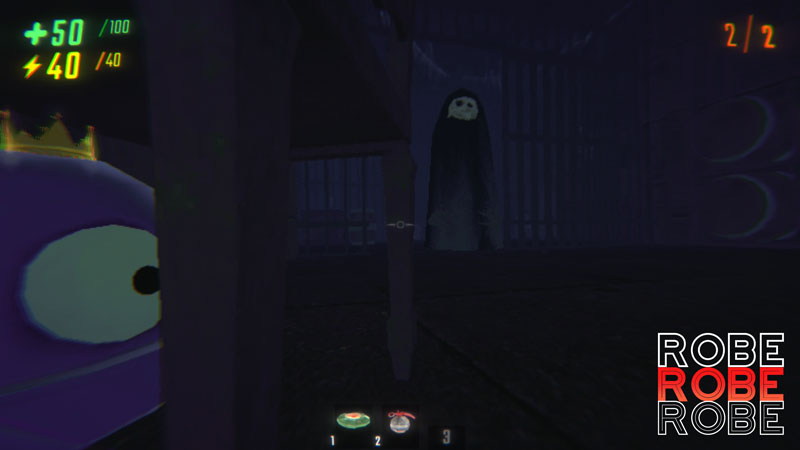
Robe Strategy
High Damage and Threat: The Robe deals varying damage to you depending on whether you’re standing or crouching – only 50 damage while crouching and enough to one-shot a standing player with no health upgrades. Get low!
Observe Before Acting: Robe’s behavior can vary. Take a moment to assess its directing before making a move, but be ready for it to turn around on a dime.
Avoid Provocation: Looking at its mask can trigger hostile responses from Robe, giving him a speed boost and a thirst for robo-blood. Proceed with caution.
Pro Tips & Extra Screaming
Don’t Gaze Longingly Into His Eyes: As long as you haven’t met eye-to-eye, you should be able to out walk the Robe with your base speed. However, if he sees you eyeing him from across the room, you better book it, break line of sight, and hide.
Hiding Isn’t Always Safe: Robe will remember where you go and can reach down to pull you out of your hiding spot so be sure you’ve broken line of sight before trying it.
Shadow Child
Health: 150
Damage: 30
Strength to Lift: 9
Orb Value: $2k – $5k
Shadow Child appears as a small, shadowy figure resembling a child, complete with eerie giggles and unsettling playfulness. Don’t let its size fool you; this little nightmare can teleport around the map and wreak havoc if stared at long enough.
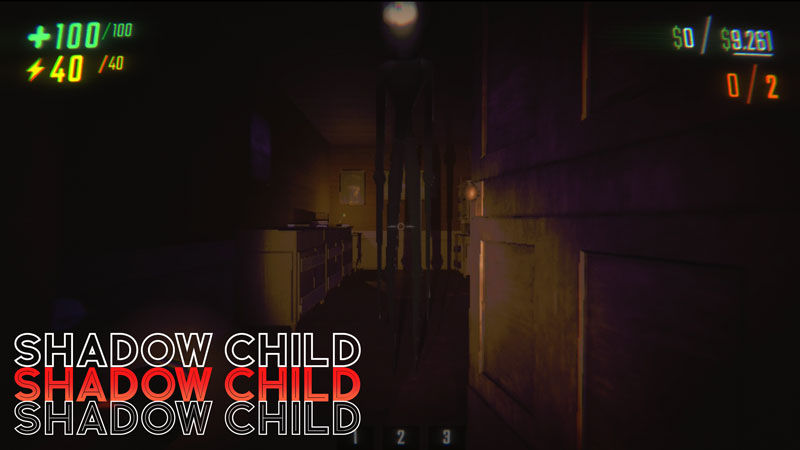
Shadow Child Strategy
Don’t Look: Shadow Child thrives on attention and will jumpscare and damage you if you stare at it for 2-3 seconds, dealing 30 damage. You can be damaged by the environment after being thrown as well so just don’t look at it.
If You HAVE to Look: This pint-sized terror loves to be right where you need to go, so if it’s blocking your way, you can look at it with the corner of your screen to watch for it to move away with a giggle.
Pro Tips & Extra Screaming
Don’t Engage: They really are a low threat monster so generally waiting for it to move is the easiest strategy.
Fight If You Want: If you really want to get your hands dirty, it doesn’t have that much health (only 150) so you can jump + tumble into it to stun the Shadow Child and proceed to beat them with a melee weapon. Just remember that the tumble can damage you so don’t try it while on low health.
Trudge (Knight)
Health: 500
Damage: 100
Strength to Lift: 13
Orb Value: $5k – $8k
Imagine a medieval knight who took a detour through a lava pit and decided to accessorize with a massive mace. That’s Trudge for you—a towering, armored monstrosity with an elongated neck and a skeletal visage that screams “final boss material.” Despite its imposing appearance, Trudge moves with all the urgency of a snail on vacation.
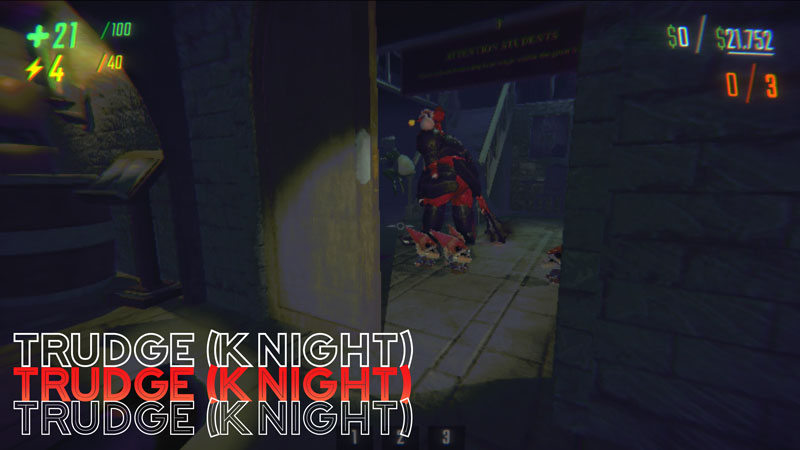
Trudge Strategy
One-Hit Wonder: Trudge doesn’t believe in second chances. Get within range of its mace, and you’ll be treated to an instant trip to the afterlife.
Magnetic Personality: This hulk has a knack for pulling you and your valuables closer, thanks to the magnetized effect of its mace. The shockwave won’t do much to you, however, the follow up is a one-hit KO.
Peekaboo Pro: Think you’re safe hiding under a table? Think again. Trudge can and will use tendrils to reach under furniture and snag you.
Pro Tips & Extra Screaming
The Juice Isn’t Worth the Squeeze: Trudge’s monstrous 500 health is the largest in the game, making this fight usually not worth it.
Use Landmines and Grenades: If you have rage in your heart directed at Trudge, you can still take him on. I recommend keeping your distance with grenades and landmines though.
Avoid the Vacuum: Be wary of its pulling mechanic. If you feel yourself being dragged toward a fashion disaster, it’s time to make a hasty retreat.
Embrace R.E.P.O.'s Madness
Surviving encounters with R.E.P.O.‘s monstrous inhabitants requires more than just guts; it demands brains, agility, and a dash of insanity. Whether you’re trying not to hug the adorable Apex Predator, yeeting Gnomes like you’re shooting a 3-pointer, or hiding from the unsettling Shadow Child, remember: adaptability is your greatest ally.
For more information, check out our full R.E.P.O. Game review and stay tuned for more deep dives into the horrors that await. Until then, keep your wits sharp and your running speed upgrades handy!
The nightmare is far from over.
Want More?
Check These Out Next!
About Report AFK
A place for gamers, by gamers, untarnished by legacy gaming media and their herds of sheeple.
Site Links
Copyright 2025 ReportAFK.com




CeeLo
March 28, 2025
Holy f**king long ass guide batman. This must have taken a hot minute so thanks for this.
Ayefkay
March 31, 2025
Haha yea, ngl – this took a bit but I’m really glad you liked it. Thanks for stopping by Ceelo!
Becka
March 29, 2025
Damn, thanks
Ayefkay
March 31, 2025
Hey Becka, you are very welcome!